
|
Model Number: CB-0000G/C |
Pilot: Ribbons Almark |
|
Cost: 3000 Hp: 650 Transform: X Form Change: O |
|
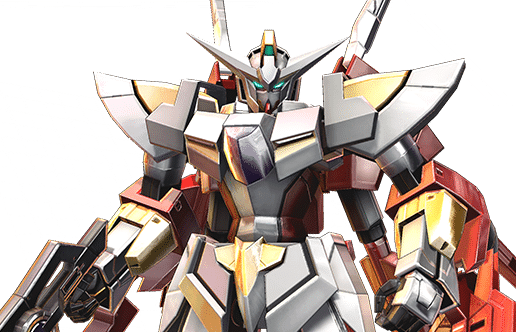
Due to Ribbons’ unwillingness to work with a companion, the designs of the all-purpose 1 Gundam and the support GN Cannon were combined into a single Mobile Suit known as the Reborns Gundam. It was a technological marvel of its time, boasting both high mobility and destructive firepower.
Reborns Gundam Ability Summary
|
Ranged |
Armament |
Ammo |
DMG |
Notes |
|
Main |
GN Buster Rifle |
8 |
75 |
Slow reloading BR |
|
Rear Main |
GN Cannons |
25 ~ 100 |
Stop & shoot with Large GN fin Fangs from its back. Triggered when Reborns Gundam fires out of angle, with its back facing the enemy. |
|
|
Charged Main |
GN Buster Rifle (High Output) |
– |
130 |
Slow charging time. One-shot force down. |
|
Sub |
GN Buster Rifle (Gerobi) |
1 |
33 ~ 134 |
Mobile shooting Gerobi |
|
Special Shooting |
Gaga Assist(Delayed) |
2 |
78 |
5AC Delay Kamikaze assault. |
|
Gaga Assist(Sequential) |
63 ~ 95 |
*AC Kamikaze Assault. |
||
|
Special Melee |
Reborns Cannon Transformation |
– |
– |
Inputting a direction will allow Reborns Gundam to do a flip to that direction while transforming into Reborns Cannon. |
|
Burst Attack |
I am the Savior! |
_ |
311(F)/292(E)/298(S) |
Final Shooting style melee combo. |
|
Melee |
Input |
DMG |
Notes |
|
5B |
5BBBB |
209 |
4 consecutive slashes |
|
5BBB~8B |
198 |
Cut through & launch |
|
|
5BBB~2B |
226 |
Stab & do a point-blank range shot with the GN Buster Rifle |
|
|
5B(EX) |
5BBBBBBBBB |
304(F)/276(E&S) |
Extended stages of melee after the 4th hit. Only availble during |
|
8B |
8BBB |
193 |
|
|
4/6B |
4/6BBB |
171 |
Main tool for Reborns Melee |
|
2B |
2B |
70 |
Uppercut |
|
2B~A |
189 |
3 Continuous BR follow-up |
|
|
CC8B |
CC8B |
145 |
Drag & Grind target with GN Beam Saber |
Reborns Cannon Ability Summary
|
Ranged |
Armament |
Ammo |
DMG |
Notes |
|
Main |
GN Cannon |
24 |
55 ~ 172 |
Stops to fire. |
|
Back Main |
GN Buster Rifle (HIgh Output) |
3 |
130 |
Oneshot forced down BR. |
|
Charged Main |
GN Cannon (Rapid fire) |
– |
18 ~ 168 |
Multiple shots with poor tracking |
|
Sub |
Small GN Fin-Fangs |
2 |
20 ~ 76 |
All range melee attack. Short stuns |
|
Special Shooting |
Large GN Fin-Fangs (Gerobi) |
2 |
26 ~ 229 |
5AC: A very Strong Gerobi with high damage & Tracking. |
|
Large GN Fin-Fangs (Deployed) |
17 ~ 125 |
*AC: All Range Attack that each Fin-Fangs shoots small Gerobi. |
||
|
Special Fighting |
Reborns Gundam Transformation |
– |
– |
Similar to Gundam mode BC. |
|
Melee |
Input |
DMG |
Notes |
|
5B |
5B |
30 |
Stuns target. |
|
2B |
2B |
90 |
360-degree sweep. |
Cancel Routes:
[Reborns Gundam]
A: AB, AC, BC
Rear A, CSA, AC: AB, BC
AB, various melee: BC
BC: various moves excluding BC
5B, 4/6B: AB
CC8B last hit: AC
[Reborns Cannon]
A: AB, AC, BC
AB: AB, AC, BC
AC: BC
*AC: AB, BC
BC: various moves excluding BC
*B except 2B: A, AB, AC, BC
2B: BC
Overview
Anyone who has taken a gander at the Japanese MBON tier lists already knows that the Reborns Gundam stands alone at the pinnacle of the 3000 cost bracket, lording over all other units from its S-tiered, golden throne. However that placing is well-deserved, because the amount of skill required to succeed with Reborns is proportionate to the potential it holds.
Switching between its Gundam Mode (G Mode) and Cannon Mode (C Mode), the Reborns Gundam is an all-rounder Mobile Suit that has access to a wide array of weaponry, and the abundance of cancel routes to use them freely. Put as simply as possible, the suit’s playstyle involves switching constantly between the two forms to make use of all of its moves. Instead of thinking of each form as separate parts of the MS and contemplating the strengths and weaknesses of each form, it’s important for Reborns Gundam players to think of the MS as a single unit. Note that in its G Mode, Reborn’s C Mode weapons reload 50% slower, and vice versa.
In G Mode, the Reborns Gundam has faster mobility and has access to strong self defense options including freefalls. Its Main, one-shot down CSA, moving gerobi AB, and excellent assist make up its superior move pool, rounded out by its good melee moveset. If there’s one downside to this mode it would be the slow reload times on many of its moves, and the slow charge time on its CSA.
Reborns Gundam’s C Mode has two fast and high-tracking Main projectiles, a high-damage gerobi, and Fangs for all-range attacks. While in this mode the Reborns Gundam has very poor mobility for a 3000 cost unit and plenty of moves that cause vernier, so it’s not recommended to stay in this form for long periods of time.
When you put everything together and take full advantage of all of its moves, the Reborns Gundam excels in close, mid, and long range, making it truly worthy of being referred to as an “all-rounder”. If there are two moves that make Reborns the indomitable presence that it is, those would be its Gaga assist which makes the Reborns a tyrant in the close range, and its BC form switching maneuver that allows it to cover great distances in an instance, whether you’re approaching an enemy or fleeing the scene. Everything put together makes Reborns a nightmare for melee units, and played perfectly it presents no opportunity for any to so much as even touch the tip of its high heels.
The Reborns Gundam gets even stronger when in Trans-Am. It becomes blindingly-fast, and can easily overwhelm opponents with terrifying mixups consisting of melee attacks and powerful gerobis.
However, as mentioned earlier, the price to pay for the ultimate power is steep. Reborns’ cancel routes take much time to master, and learning to actually apply all of its techniques in actual combat is no mean feat. There is a certain point in mastery that players need to achieve before they can start seeing success in matches, and it’s not a place you can reach after just a couple of hours of practice. This is one of the few Mobile Suits in the game you cannot blame for your losses— if you lose, it just means you weren’t able to draw out its full potential.
Reborns Gundam Ability Details
A more orthodox, all-rounder form compared to the C Mode. It has an assortment of powerful weapons for a variety of situations. While its melee attacks are not suited for direct clashes, they have quick startup and are great for chasing down opponents. However one big weakness of this form is the long reload time on its weapons, although this can be mitigated by using your C Mode weapons and CSA as part of the mix.
Ranged Weapons
Main: GN Buster Rifle
3.5-second reload per shot. A 0.5-second longer reload than your standard Beam Rifle, but with the same stable and good performance you would expect from this type of weapon. Like all suits with a BR, this is a very important tool for the Reborns Gundam.
Rear Main: GN Cannons
You fire this weapon when firing your Main out of angle (with your back facing your target). Reborns verniers and fires 4 shots simultaneously from the GN Cannons mounted on its back. Costs 1 Main ammo.
You can cancel this into Sub to freefall, which is one of the G Mode’s self defense methods. The projectile speed and tracking on this move are average, but the startup and muzzle correction are very good. Hitting all the projectiles causes an instant knockdown.
If your C Mode Fangs are currently deployed, firing a Rear Main shot will instead simply fire a back-facing BR shot.
Charged Main: GN Buster Rifle (High Output)
4-second charge time in G Mode. Fires a single, powerful beam that instantly knocks the enemy down on hit. The move’s damage is average but the projectile speed and muzzle correction are extremely good, and the inertia inheritance for movement makes this very easy to use, plus you can cancel into Sub to freefall. All of the aforementioned makes this move a very potent tool in mid range shooting battles.
The one downside of this move is its long 4-second charge time, which is why it is standard practice to charge CSA in C Mode, then switch to G Mode to fire this move. It only takes 1-second to charge CSA in C Mode, even factoring in the form-switching time it’s still much faster to charge it that way. This is a great move to use with the Second Impact technique.
Sub: GN Buster Rifle (Focused)
A “moving gerobi” type move. Takes 7 seconds to reload. This move does 33 damage per hit to a maximum of 134 damage, but if you cancel into this move cancel proration applies, causing it to deal 28 damage per hit for a total of 114 damage.
This is G Mode’s close to mid-range pressure tool. While the beam is relatively thin and ammo is scarce, the startup of this move is fast, and being able to use it in completely free conjunction with your Main makes it more difficult to see coming and dodge compared to say, Wing Zero TV who advertizes that his CSA is ready with its glowing Buster Rifle.
Although it doesn’t rack up a lot of damage, you can cancel from your Main into this to score a quick down, or use it with a variety of your other moves to freefall.
Just be careful of the narrow firing angle of this move, which may cause you to vernier if rear-fired.
Special Shooting: Gaga Assist
2 ammo. Reloads on empty, takes 16 seconds to reload. Reborns summons 3 Gagas in front of it that protect Reborns at the cost of their pilot’s lives. If the Gagas come into contact with anything other than Reborns itself they explode, causing an explosion similar to a bazooka shot. Because the Gagas’ attacks are “melee” attribute they can pierce through shooting guards, although the secondary explosion can be blocked by the likes of Qan[T]’s shield.
Directional input affects the performance of this move. 5AC releases three Gagas that slowly advance towards the enemy together, while *AC releases three Gagas that stand still for a moment before charging quickly one by one at the target. 5AC Gagas do 60 damage on collision while *AC Gagas do 45. The secondary explosion on both versions does 25 damage.
This is one of Reborns’ lifelines, used in offense as well as defense. The startup of this move is near instant, making it one of the best self defense moves. You can even use this move fearlessly in zero proximity to the enemy. The down value and damage on this move is also high. A~AC~AB is one of Reborns’ most important cancel routes, providing you with a near impregnable defense from incoming melee attacks. The AC~AB portion allows you to freefall, but you need to be facing front in order to do so.
However, take note that while the coverage of this move is nearly 180-degrees around you, it is possible for enemies to get around the Gagas. While it’s easy to think of this as a one-button instant melee shutdown option nothing is absolute in MBON so don’t get too cocky.
Special Melee: Reborns Cannon Transformation
Transforms from G Mode to C Mode. Directional input influences the performance of this move. 5BC makes Reborns transform on the spot, while directional inputs make Reborns flip towards the input direction while transforming. The directional transformation versions of this move inherit a lot of inertia, especially the forward and backward versions that can allow you to travel great distances very quickly.
This does not cut tracking, but the big movement allows you to dodge most projectiles with ease. When in Overheat you will perform the 5BC transformation regardless of your directional input.
After transforming into C Mode you can immediately cancel into any of the C Mode’s moves. The rigidity after transformation is also minimal, meaning you can sidestep or guard after transforming with few vulnerability frames. Because the transformation is considered a cancel route, red lock inheritance is applied, so you can still track enemies with your C Mode moves if they escape to green lock while you transform. You cannot cancel BC into itself, but you can use one or two moves between BCs to keep the cancel chain going.
Needless to say this is a very important move for Reborns, not only for switching between forms but for mobility.
Melee Set
5B: Large GN Beam Saber
A 4-stage melee combo. Like most 5B melee moves this is most usable as a combo part for dealing good damage. During Burst this move gets powered up, dealing more hits and damage.
5B~8B Derivative: Slash-through
A simple slash-through that puts the enemy in an untechable state. Low damage but good cut resistance, and a quick way to finish a combo safely.
5B~2B Derivative: Stab>Zero-proximity GN Buster Rifle
High damage but zero cut resistance. This costs some boost to perform, and you cannot sidestep or Sub cancel from this move.
5B(EX) Trans-Am Combo Slash
During its Burst (Trans-Am), Reborns’ 5B goes from a 4-stage melee combo to being a whopping 9-stager. The attack is the same as the regular 5B up till the 3rd hit, and you are locked into a forced PoV change on the 5th hit onwards. The attack animation is long but the damage dealt is high. However, it may be inefficient to perform such a long attack during your short Burst duration.
8B: Step~Kick~Slash
3-stage melee combo. Big movement on the first stage, which also stuns enemies on hit. The hitbox on this is very big, and it’s very likely to win out in direct melee clashes. This is a great melee attack overall, and is one of your two main melee attacks (the other is 4/6B). The damage dealt is also high, making it suitable as a combo part.
4/6B: Horizontal Slashes>Kick
3-stage combo. PoV change on the last hit. The priority on this is low, but the startup is fast and the dash speed and reach are also very good. This is your chase down or surprise melee attack. The entire combo is also very fast, making it suitable as a combo part. The last hit of this move deals less damage than the first two, so try to cancel out into another move before the final hit to deal more damage.
2B: Uppercut
A quick rising slash. Overall a lackluster move, although you can use it as a launcher for continuing melee combos.
2B~A Derivative: GN Buster Rifle Triple Shot
Stands still to fire three consecutive shots from the GN Buster Rifle. Long combo time with no cut resistance. There’s also a forced PoV change, boost consumption, you cannot sidestep or BC cancel out of this move, and it’s difficult to follow-up after.
CC8B: Grinding Large GN Beam Saber
Slashes the enemy and pulls it across the battlefield, dealing multiple hits. The move has a long animation but the travel distance is pretty far.
The reach on this move is good, but the travel speed is lackluster, making it unsuitable as a chase down move. The priority on this move is good, but the hitbox is more to the side of Reborns rather than straight down the center, which can occasionally cause problems.
Burst Attack
I AM THE CHOSEN SAVIOR!
Same Burst Attack is performed in both G Mode and C Mode, but if you start this move in C Mode you will transform into G Mode first before attacking.
Super armor startup melee combo ending with the Last Shooting technique. This is a homage to the fact that the VA for Ribbons Almark is the same VA who did the voice of Amuro Ray.
You can use this as a big damage combo ender when the opportunity presents itself, and because the initial attack has a good travel distance you can also bet on hitting it raw now and then.
Reborns Cannon Ability Details
C Mode has poorer boost performance than G Mode, and plenty of moves that cause vernier. However, in exchange it has a wide array of powerful ranged weapons. Excelling at mid to long-range, it has two different Mains, two types of all-range funnel-type weapons, and a high-damage gerobi for laying waste to unsuspecting enemies. If you are show down while in C-Mode you will respawn in C-Mode. Reborns is extra vulnerable when in Overheat as C-Mode so be careful.
Ranged Weapons
Main: GN Cannon
2-second reload per shot. Reborns stands in place to fire up to 4 beams in a row. The projectile speed and tracking of this move are good and you inherit a lot of inertia before firing this move, but standing still for a long time can be deadly.
When transforming from G Mode to C Mode you can cancel into this move to fire while free falling. On its own this move is average, but when used together with your other moves and cancel routes it becomes an important part of your offense and defense.
Back Main OR A when *AC is deployed: GN Buster Rifle (High Output)
2A input, or A when the Fin Fangs are deployed. Fires a single beam that causes an instant knockdown. This move is very similar to the G Mode’s CSA, but this has poorer muzzle correction. Still, this is a really good move. You can cancel into it immediately after transforming into C Mode, or you can use it as a combo finisher.
This move inherits a lot of inertia as well, so as a self defense measure you can repeatedly use 2BC~2A to retreat backwards while firing one-hit down beams. Reborns has a lot of great self defense measures, and this is one of them.
Charged Main: GN Cannon (Rapid-fire)
1.5-second charge time. Reborns stands in place to fire a volley of shots from its GN Cannons. This inherits a lot of inertia like your Main, but there is almost zero tracking to this move, and muzzle correction only on the first hit. If you don’t hit the first shot of this, it’s advised that you cancel out early.
While this is not one of Reborn’s best moves by any means, its true value is its quick charge time. You can charge CSA in C Mode, then transform into G Mode to fire its superior CSA. This is a common technique for Reborns that all beginners are recommended to learn.
Sub: Small GN Fin Fangs
Reborns releases 4 Small GN Fin Fangs that surround the enemy to stab it, causing a strong stagger on hit. 5-second reload per set of Fangs.
This is basically an all-range type weapon. The tracking and performance of this move is average overall, and it can track even in green lock. While this isn’t exactly a powerful move, you can just toss it out whenever at no penalty, unlike the *AC Fangs that restrict the usage of other weapons.
Special Shooting: Large GN Fin Fangs
Two variations available. 15-second reload once both uses have been expended. Both of these moves are really good, and are the main tools of the Reborns Cannon.
5AC: Reborns fires a big gerobi at the target. This is C Mode’s biggest damage move, and for Reborns as a whole this is an important move for dishing out the hurt.
The startup on this move is average, but taking into account that you’ll be spending most of your time in G Mode and you’ll have to switch to C Mode to fire this, its “startup” is potentially much longer.
However, the projectile speed, size, and muzzle correction of this move are all excellent, plus it inherits a good amount of inertia on startup. One minor downside is that the damage is dealt slowly, so if you cancel out of this move early or if you’re interrupted you’ll do very little damage. Remember that you can cancel out of this move into any of your BC movements to evade whenever necessary.
When in Trans-Am, the startup on this move becomes a lot quicker, making it even more useful. It’s a very sound strategy to try and hit this move during your Burst, but don’t try too hard to force it.
*AC: Reborns releases the Large GN Fin Fangs to surround the enemy and fire thin gerobi beams, similar to Hot Scramble’s funnel attack. When the GN Fin Fangs have been released, all GN Cannon moves cannot be used. These include the C Mode’s CSA and AC, and G Mode’s rear Main. Because you cannot charge your CSA with C Mode you can not use the fast charge technique to fire your CSA in G Mode while the Fangs are out.
As far as funnel-type weapons go, this is one of the best. It’s easy to catch enemies with this move, making it one of Reborns’ weapons of choice. If you’re in a situation where you can’t use the gerobi 5AC, just use this. There is very little risk involved in using this move, and it can force enemies to move which can open up punish opportunities. Try not to just fire and forget this move— attacking together with it puts a lot of pressure on the enemy.
Special Melee: Reborns Gundam Transformation
Exactly the same as the transformation move from G Mode to C Mode. After reverting to G Mode you can use A~AB to freefall and land. It’s good to learn all the various cancel routes and options available to you when transforming back into G Mode.
Melee Set
5B: Egner Whip
An anchor attack that stuns the enemy and pulls it towards you. The startup on this move is fast but the reach is short. The muzzle correction is also not very good, so you can get beaten out pretty easily by melee moves with a good wraparound curve.
This is one of C Mode’s self defense moves, but in general you don’t want to be in a self defense situation in C Mode at all— if you think the enemy is planning on coming in close, it’s better to try and stay in G Mode for its superior defensive options.
2B: Large GN Beam Saber Spin Slash
A 360-degree spin with the Large GN Beam Saber. Reborns does not move forward at all, instead simply spinning where it stands. A special feature of this weapon is that you will not be staggered even if you hit a guarding enemy. For self defense this is a better option than the Egner Whip, but it’s still preferable to not be in C Mode at all.
Recommended Combos
Reborns Gundam (G Mode)
|
Ranged Weapons |
||
|
Input |
DMG |
Notes |
|
A>>A>>A |
156 |
Zunda |
|
A~AB |
126 |
136 if you BDC. Quick down |
|
A>>CC8B~6BC~5B>2A |
206 |
|
|
A>>4/6BBB |
184 |
BnB off Main. End with CSA for 205 |
|
Melee |
||
|
5BBB~2B~CSA |
254 |
|
|
5BBB>8BBB |
229 |
|
|
8BBB~CSA |
265 |
You can also use 5BC~2A as the combo finisher |
|
8BB>8BBB |
245 |
|
|
4/6BBB>4/6BB |
231 |
End with CSA for 249 |
|
4/6BB>8BBB |
236 |
|
|
CC8B>4/6BB~CSA |
260 |
|
|
CC8B>4/6BBB |
243 |
|
Reborns Cannon (C Mode)
|
Ranged Weapons |
||
|
Input |
DMG |
Notes |
|
A(3hits)~BC~G Mode A |
183 |
|
|
A(3hits)~BC~G Mode CSA |
210 |
|
|
AB>>G Mode CSA |
144-178 |
|
|
AB>>5AC |
190-219 |
|
|
Melee |
||
|
5B>2A |
141 |
|
|
5B>A(4hits) |
169 |
|
|
5B>5AC |
221 |
|
|
2B>5B~2A |
199 |
|
|
2B>5B~BC~8BBB~CSA |
251 |
|
Strategies
- Reborns strength comes from its wide array of powerful moves, and all the cancel routes it needs to take full advantage of them.
- You want to be in G Mode most of the time, especially in the mid to close-range. You can still switch to the C Mode to release funnels or fire surprise gerobis, but be sure to revert back to G Mode quickly to take advantage of its superior mobility and self defense options.
- G Mode’s CSA is really good but has a long charge time. One common cancel route you can use is (Starting in G Mode): [BC~A(hold)~BC]. Transform into C Mode, fire a Main shot (you can use 2A if you prefer), keep holding A, then transform back into Gundam Mode. If executed correctly you should get the fast CSA charge time of C Mode, and you should have your CSA charged up as soon as you transform back. Of course you can use any variation of BC you’d like to stay mobile during this cancel route.
- One of the most important moves in G Mode is your Sub. It has strong muzzle correction and is very fast, making it excellent for hitting enemies in the close to mid-range. Force enemy movement with your Beam Rifle, and look for opportunities to hit the Sub.
- The Gaga assist is a near-impenetrable anti-melee self-defense technique. It beats everything from shooting guards to super armor (if you hit two Gagas, or if you follow-up into Sub). With its fast startup it’s very easy to use on reaction as well. Hit the enemies enough times and it will discourage them from even trying to melee you, which you can use to your advantage. However, be aware that enemies will also be counting how many Gagas you have left, and are likely to go on the offensive if you should run out. In such cases try to play more defensively, try using your BC movement to simply put distance between you and potential threats.
- Hitting your C Mode 5AC gerobi is a great way to deal damage fast. Look for situations where the enemy is unlikely to attack you, and quickly use 5BC~5AC to switch from G Mode to C Mode and fire your gerobi.
- If you’re using the C Mode’s AB or *AC Fangs, try not to just release them and hope they hit. Use them in coordinated attacks with the main Reborns Gundam. A good way to set enemies up is to wait for them to boost dash jump or spend roughly 50% of their boost gauge before releasing the Fangs. This helps to ensure that they will have less boost available to evade both you and the incoming Fangs.
- While Reborns’ damage output is pretty standard in its normal state, it turns into a true damage beast during Trans-Am. You can go on a heavier offensive during your Burst, and try to chase down and bully weaker units.
- An honest summary of Reborns is that it has everything it needs, although not all at the same time. Having to switch to C Mode and back makes you a single beat slower, which can prove fatal. Not counting your 5AC your damage output is also average. Aim to calmly whittle down the enemy’s HP while remaining mobile and difficult to read.
- F Burst is the Burst of choice for most of the best Reborns players. It greatly powers up your melee game and gives you a big mobility boost as well, allowing you to easily chase down enemies. Reborns has plenty of moves that forces enemy movement, and in F Burst it finally gets the means to effectively follow up on those opportunities leaving the enemy with no chance of escape. Enemies will also be scared to duke it out with you because of your omnipotent Gaga assist.
- E Burst is lackluster because it offers no comeback factor. S Burst powers up your shooting moves and allows you to sidestep cancel your shooting attacks as well as charge up your powerful CSA quicker. In short this Burst gives better self defense, but Reborns already has plenty of that normally, plus it already has all the cancel routes it needs.
- Reborns pairs best with a partner that has good survivability. Although Reborns is a flexible MS that can take the backline when necessary, it’s still preferable for the Reborns to die first. Good partners with strong survivability include The O, Strike Noir, Dark Hound, and GP03.