
|
Model Number: GNT-0000/FS |
Pilot: Setsuna F Seiei |
|
Cost: 3000 Hp: 650 Transform: X Form Change: X |
|
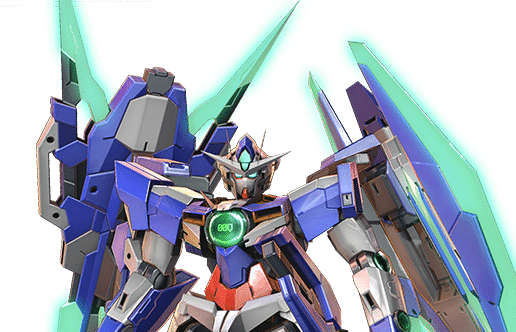
The 00 Qan[T] Full Saber is the 00 Qan[T] equipped with the GN Sword IV Full Saber equipment. The GN Sword IV Full Saber was developed before the GN Sword V and was equipped with a stabilization system for the new Twin Drive system, which was still new at that time and frequently developed problems. The Full Saber setup is also equipped with two new weapons: The GN Sword IV, which can transform into 5 different modes for carrying different kinds of attacks, and the GN Gunblades, three dagger-like blades attached to the GN Sword IV which can be used in three different forms.
These weapons boast extraordinarily high combat potential for the unit, but never saw actual combat.
Move Summary
00Qan[T] Full Saber
|
Ranged |
Armament |
Ammo |
DMG |
Notes |
|
Main |
GN Gunblades Gun Mode |
6 |
75 |
BR with a wide shooting angle. |
|
Rear Main |
GN Gunblades Gun Mode ( Double Shot) |
55~110 |
Stop & shoot with both gunblades. Triggered when 00Q[T]FS fires out of angle, with its back facing the enemy. |
|
|
Charged Shooting |
GN Sword IV Full Saber GN Launcher Mode |
– |
50~128 |
3 consecutive BR shots. |
|
Sub |
GN Katar & GN Gunblade (throwing) |
1 |
45~89 |
Cartwheels while throwing two projectiles. |
|
Neutral Special Shooting |
GN Sword IV Rifle Mode (Wide Cutter Particle Beam) |
2 |
27~125 |
A crescent beam that deals multiple hits. |
|
Directional Special Shooting |
GN Sword IV Rifle Mode (Focused) |
32~214 |
Gerobi with good muzzle correction & size. |
|
|
ABC |
Cutting Through The Universe Itself | _ | 310(F)/268(E&S) | Melee rush combo with high cut resistance |
|
Melee |
Input |
DMG |
Notes |
|
5B |
5BBB | 192 | High damage |
| 5B(B)~8B | 142~189 | Special Down | |
|
8B |
8B | 95 | Bounce Down |
|
4/6B |
4/6BB | 130 | Good performance on the first hit |
| 4/6B~8B | 142 | Hard Knockdown | |
|
2B |
2B | 204 | Melee counter with a shooting guard. ~B follow-up available |
|
CC8B |
CC8BBBBB | 236 | Fast movement, good cut resistance |
|
~AC Melee Derivative |
Quantize | – | Derivative from melee attacks that let’s you quantize and become intangible. Can be canceled to other melee attacks |
|
BC
|
BC~BB | 279 | High damage |
| 8BC | 80 | Slash-through with a shrunk hurtbox | |
| 4/6BC | 193 | Horizontal strafe prior to a slash | |
| 2BC | 120 | Shooting guard on a stab |
Cancel Routes:
A: AB, AC, BC
CSA: AB, BC
AB: A, BC
AC: BC
5B, 8B, 4/6B, 2B (2nd state): AB
4/6BC: 5B, 8B, 4/6B
~AC Derivative during melee: 5B, 8B, 4/6B, BC, ABC
Overview
00 Qan[T] Full Saber (henceforth referred to as FS) Is a mid to close-ranged specialist armed with a wide range of weaponry, and the cancel routes that allow you to fully utilize all of them.
Unlike the regular Qan[T] which specializes in melee or the 00 Raiser which has a time-based powerup, FS’ main gimmick and playstyle revolves around chaining all of your attacks into each other. You can cancel any of your shooting attacks into your BC moves, which include a low-profiling high-priority slash, a move with a fast and violent horizontal curve, or a stab with a 360-degree shooting guard.
FS has a regular red lock range, but by cancelling your shooting attacks into each other you can often aim for and hit targets that escape into green lock as if they are still within your red lock range. FS also bends the rules when it comes to melee combos, being able to quantize at will making it incredibly difficult to interrupt its combos.
FS doesn’t have any large weaknesses, but if you fail to properly chain your follow-up attacks you can miss out on dealing optimal damage. In 1-on-1 situations FS is strong, but it’s not the type to deal massive damage very quickly, and if you die second and get overcost its supporting abilities leave much to be desired. For these reasons, FS pairs best with teammates that can defend themselves for long periods of time.
In short, being effective with FS means not only mastering all of its weapons, but how to chain them into one another. Doing so will unleash FS’ true potential, which can be terrifying for anyone on the opposite side of the field.
Qan[T] Full Saber Ability Details
Ranged Weapons
Main: GN Gunblade Gun Mode
A standard BR. The ammo count is rather low at only 6, but you have plenty of other weapons and a CSA to make up for it.
Rear Main: GN Gunblade Gun Mode Double Shot
This weapon is fired instead of your Main when you input Main while your back is facing the enemy. FS stands still and fires two beams at the enemy. The down value on this move is high but if you only hit one beam you won’t score a down. This is the highest one-hit beam damage FS can deal, making it a useful combo ender. Just be careful about not accidentally firing this move because it can leave you vulnerable.
Charged Main: GN Sword IV Full Saber GN Launcher Mode
2.5-second charge time. Fires three consecutive BR shots. 5CSA will make you stand still to fire the beams, while holding a direction on the lever will make you slide a little in the input direction before firing. The muzzle correction on this move is poor but the tracking is passable. You can cancel this into your Sub and various BC moves at any time during this move.
The second and third shots do not re-track the enemy, so if the enemy sidesteps after the first hit you will continue shooting at wherever the first shot went. For this reason it is advised that most of the time you should cancel out after the first shot instead of waiting to fire all three.
This can be used as a self defense move, and although when used individually on offense it’s rather weak, once again you can cancel it into a plethora of other moves which makes it useful for getting your offense started.
Sub: GN Katar & GN Gunblade Throw
FS cartwheels while throwing the GN Katar and then the GN Gunblade at the enemy. Both projectiles stun on hit. You can input 4 or 6 to make FS cartwheel in your direction of choice. Reloads in 5 seconds.
You can cancel out from either projectile to and from Main, and into various BC moves. You can also use it in melee combos.
The startup and muzzle correction of this move are excellent, making it well-suited for self defense as well as offense. All of the cancel routes (especially into Main) make this an extremely powerful tool. This is even more powerful in the close range, and is a great setup for your BC attacks.
The vertical tracking and vertical muzzle correction/tracking on this move is also excellent, making it suitable for hitting enemies trying to escape by boosting upwards.
Cancelling into Main allows you to freefall. Because the cartwheel moves you a good distance and you will always face the enemy during that sequence, cancelling into Main guarantees a freefall and is a great evasive maneuver.
For FS which is not exactly a melee-specialist, this move can be used as a substitute as a melee combo damage starter.
All in all this is a very important move for FS, both on offense and defense. Because this is such an important move in the close range, don’t use it in the mid-range and then close into the enemy without this in hand. Because this is such an all-powerful tool, you will often have to choose between using this on offense or on defense. Pick wisely.
Neutral Special Shooting: GN Sword IV Rifle Mode Beam Blade
Both the 5AC and *AC share ammo. Reloads 1 ammo every 8 seconds.
In this move, Full Saber stands still to fire a single wide, crescent-shaped beam. Deals multiple hits, each individual hit deals about 20 damage. The muzzle correction and tracking on this move is weak, but the projectile is fast and it has a wide hitbox. Overall this is a very similar move to 00 Seven Sword’s CSA.
If you can align your vertical axis with the enemy’s, this move is pretty easy to hit. Unlike your *AC this move starts up rather fast. You can use this for scoring downs off a hit Main, or catching landings in the close range. This is also effective against enemies fleeing from you. You can also use 5AC~4/6BC to get around shielding enemies, although this is range dependent.
This move also shreds through ABC mantles and HP-based shooting barriers, God Shadow, etc. This move will not instant down the enemy when fired during Burst so watch out for that.
Directional Special Shooting: GN Sword IV Rifle Mode (Focused)
Stands still to fire a gerobi. The damage of this gerobi is dealt extremely quickly. Each hit of the gerobi does roughly 27 damage. The projectile speed and muzzle correction are very strong on this weapon, making it easy to hit this in the close range. As long as the enemy is not shooting at you and does not sidestep they are bound to get hit by this when you’re close enough.
The damage is dealt so quickly that oftentimes enemies will not even be able to react and E Burst in time. Overall this is an excellent move, although hitting it requires setup. You either need the opponent to not be paying attention to you, or oppress the enemy enough so that they choose to flee from you.
Melee Set
FS attacks with a wide-range of blades and swords. Overall many of FS’ melee attacks are far-reaching and have a great hitbox, as well as good startup. You have everything you need to launch an effective melee offense. Also, its cut resistance is excellent thanks to its CC8B and Quantize derivative. However, you may find yourself on the losing end against melee suits with better melee moves, so don’t just rely on hitting melee raw.
~AC Derivative: Quantize
A derivative available to 5B, 8B, 4/6B, and 2B. FS quantizes, turning into pixie dust and becoming completely intangible. While quantized you can move diagonally left, diagonally right, or backwards, depending on your directional input. You can use this even when in Overheat, but you will move a much shorter distance. You can also sidestep this motion.
You cannot take any damage while quantized. You also cut all tracking while quantized. This is an incredibly useful tool which takes your cut resistance to the maximum, and can also be used as a substitute for sidestepping in chaining your melee attacks together.
You can cancel your quantize into any melee attack (including BC attacks) except 2B. You can also link it directly into your Burst Attack, if available. The timing to cancel is very lenient, and you can even cancel as soon as the quantize animation starts.
When performing a melee move cancelled from the quantize the reach, speed, and startup of the melee move is improved. 4/6BC will skip the wraparound phase and instantly strike the enemy. However, if you use the 2AC backward quantize derivative and cancel that into 4/6BC your sword will swing at empty air so watch out for that. The down value for BC moves is also lowered when canceled from this move, so some unique combos become available.
If you quantize and don’t cancel, you freefall very smoothly. If your enemy is aiming for your Overheat landing after you quantize, you can immediately input AB~A~any BC after the quantize ends to get some movement and attacks in. However, note that even if you quantize from a low height you will not land and refill boost until you become tangible again.
5B: GN Sword IV Full Saber
3-stage combo that deals high damage. Useful as a combo part.
5B or 4/6B~8B Derivative: Launch
Puts the enemy in a special downed state. This is an average move compared to 8BC but you can use it as a combo finisher or to quickly end a combo.
8B: Slam
Rises before delivering a vertical chop attack. Bounces the enemy on hit.
Slow startup, but good hitbox. This does high damage, and is a great combo part or finisher, especially when used in conjunction with the ~AC quantize derivative.
4/6B: GN Sword IV Full Saber Horizontal Swing
2-stage horizontal combo. Good reach, wraparound, and dash speed. The hitbox is also not bad. This is not exactly on par with melee-oriented suits like Master, but it’ll still serve you well. Can cancel into the same ~8B derivative as 5B.
2B: Counter
FS takes a counter stance. While in the counter stance you also have an active shooting guard that can even block attacks from charge-type assists. You do not gain Burst meter by guarding attacks in this state, and if the shield takes too much damage the counter state is cancelled.
If an enemy hits you with a melee attack during this state, it is stunned and you automatically counter with the 2B~B follow-up. The follow-up attack may be slow and is average in many aspects, but the damage proration is very good, making it suitable as a combo part.
On hit you can cancel into Sub or AC, but the timing on the cancel into quantize is strict. Overall this is quite a safe move to use against melee MSes. Even Melee MSes like Master and Bael that have shooting attacks cannot easily pierce the shooting guard, making this all the more potent.
CC8B: Slash-through combo
Standard Setsuna-suit slash-through. 5 stages total. Unfortunately this does not have the good cut resistance that many other Setsuna units have.
The first few hits have poor damage proration, so it’s better to finish the entire combo before canceling into other attacks in order to get more damage. Step backwards after the final hit and wait a short duration before continuing the combo.
5BC: GN Sword IV full saber & GN Sword V Buster Sword
Dual-wielding attack. Very high damage 3-hit combo, with a forced PoV change on the last hit. The first hit has a big hitbox but very slow startup, making it unsuitable as a combo starter. Instead, try using this after hitting your Sub for big damage. During F Burst this attack becomes easier to hit and does more damage, leading to combos dealing over 300 damage.
8BC: Slash-through
FS low profiles and deals a single slash-through. Launches the enemy upwards on hit. While dashing at the enemy FS’s hitbox shrinks, making it possible to slip past projectiles like BR shots.
The dash speed, reach, and priority of this move are all excellent, making this a great move. However the startup is a bit slow, so use this from a good distance away. If you’ve just thrown your AB daggers and are trying to clash with an enemy using melee attacks, this is your go-to.
4/6BC: Wraparound Slash
FS dashes at the enemy in a curved angle before delivering a slash. Similar to Turn X’s 4/6BC. On hit this has good damage proration, and hitting this puts the enemy in an untechable down state.
The reach of this move and the dash speed are excellent. In the right situation, to escape from an enemy in Burst you can switch targets to its partner and use this move repeatedly to run away. You can charge CSA while doing this, and on the final 4/6BC you can cancel into CSA~AB~A to freefall.
You can use this move to setup the right axis for firing CSA, as a gap closer, or self defense.
2BC: Stab
Stabs at the enemy with the Sword Bit Barrier active, providing a 360-degree shooting guard. Pushes the enemy away in a normal down state after the attack.
The barrier requires a short duration to activate after using this move, so you have to use this pre-emptively prior to an enemy’s attack. The barrier will also not block explosions caused by missiles and bazookas. However, physical attack projectiles like Legend’s Beam Spikes and slash-through assists will bypass the guard.
The Sword Bit Barrier is active even when attacking, so you can hit enemies firing gerobis while guarding the entire attack. The distance this move travels is also relatively far.
There are many ways to set up this move, including cancels from regular melee attacks, from AB~A, etc. The slow startup means you need to set this move up properly, and the actual priority on the stab is low meaning you’ll lose out against many melee intercepts. However, this is a powerful move if set up properly with the right reads made.
Burst Attack
Cutting Through The Universe Itself
Super armor startup melee combo. FS also quantizes for a large portion of this combo, making this extremely difficult for enemies to interrupt. The damage dealt is also good, and the actual reach and chase speed is also good.
This is one of the more easy and safe to use Burst Attacks in MBON. It’s still best to try and combo into this, but if the opportunity presents itself feel free to try and hit this raw as well. Worst case scenario you miss and get punished, but since you’re in Trans-Am you’ll just quantize away.
Recommended Combos
|
Ranged Weapons |
||
|
Input |
DMG |
Notes |
|
A>>A>>A |
158 |
Zunda |
|
A~AB(2hit)~A |
158 |
BnB |
|
A>>Rear A |
151 |
Fast down |
|
A>>A~AB(1hit)~A |
161 |
|
|
A~5AC |
114 |
|
|
A~*AC |
158 |
|
|
A~5BC |
207 |
|
|
A>>CC8BBBB>>2B~B |
211 |
|
|
CSA(1hit)~5BC |
230 |
|
|
CSA(1hit)>>CC8BBBBB |
226 |
Best option most of the time |
|
AB~A~8BC |
158 |
|
|
AB~8BC>2B~B |
197 |
BnB |
|
Melee |
||
|
5BB>5BBB |
238 |
BnB |
|
5BB~AC~5BC |
264 |
|
|
8B~8B~8B |
234 |
Full Saber Dribble |
|
8B~AC~5BC |
291 |
|
|
8B>>CC8BBBBB |
269 |
|
|
8B~AC~4/6BC(4hit)~8B>8B |
280 |
|
|
4/6BB>4/6BB |
210 |
BnB |
|
4/6B~AC~5BC |
256 |
|
|
2B~5B>8B |
242 |
|
|
2B~B~AC~8BC~8B |
255 |
|
|
CC8BBBBB>Rear A |
272 |
|
|
8BC>2B~B |
236 |
Quick combo. BnB. |
|
8BC>>CC8BBBBB |
245 |
|
|
F Burst Only |
||
|
5BCBB>ABC |
351 |
|
|
4/6BB>CC8BBBBB>ABC |
306 |
|
|
CC8BBBBB?CC8BBBBB>8B |
330 |
End with ABC instead for 348 damage. |
Strategies
- FS excels as a front-role presence, performing acrobatic maneuvers with its Sub to stay evasive, and constantly threatening the enemy with either a high-priority 8BC or anti-shooting 2BC. Enemies that choose to ignore you or flee from you are open to *AC gerobis.
- You want to stay one step outside of melee range, poking with your various ranged tools. Don’t take unnecessary risks- it will be hard to act since you’ll most likely be double locked. Be patient and wait for enemy mistakes or for your teammate to land a hit that gives you an opening.
- FS is guaranteed to finish every melee combo it starts (barring interference) thanks to its ability to quantize with AC even without boost. Your cut resistance is also abnormally high.
- You’re rarely out of options with FS, either on offense or defense, thanks to your wide range of cancel routes. Learn to link your attacks into each other effectively to keep going even if you’re out of boost.
- Compared to other 3000 cost units it’s much less risky for FS to stay in the close range, and with the right reads you can often come out on top.
- Like 00 Gundam and Qan[T], FS can quantize during Trans-Am. However you will not quantize if you were hit while attacking. This drains Burst Gauge, though, so avoid quantizing it if you can.
- For FS, a partner that can defend itself well and follow-up on your hits is most suitable. 2500 cost partners often die before FS, but that’s alright because FS has good self defense and evasion. A 2000 cost partner is often a safer choice at the cost of performance.
- F burst is best burst for FS. No real reason to pick S because you already have all the cancel routes you need, and powering up your melee with F burst is too attractive to pass up. You can use E if you are playing Shuffle and want to play it safe, but that’s not recommended either.