
|
Model Number: RX-78GP03S |
Pilot: Kou Uraki |
|
Cost: 2500 Hp: 620 Transform: X Form Change: X |
|
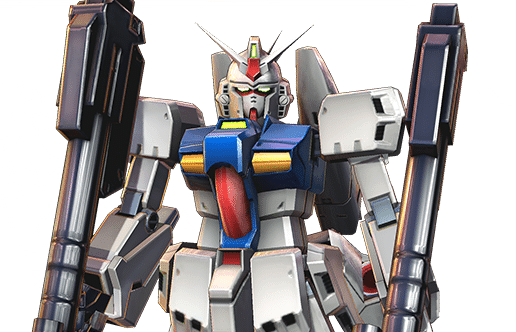
GP03 Stamen is the mobile suit which controls of the Dendrobium Orchis, a Mobile Armor designed to protect specific territories in space. Its tail thrusters gives it great mobility, and the Mobile Suit’s overall performance is overwhelming.
Ability Summary
|
Ranged |
Armament |
Ammo |
DMG |
Notes |
|
Main |
Folding Bazookas |
10 |
76 ~ 128 |
Fires 2 Bazooka per input. |
|
Charged Main |
Beam Rifle (3 shot/ High Ouput) |
– |
65 ~ 137 |
Triple BR shot |
|
150 |
One shot down BR, vernier |
|||
|
Sub |
Large Missile Pod |
2 |
75 ~ 128 |
6 large missiles in a fan shape. Able to freefall. |
|
Micro Missiles |
40 ~ 72 |
12 set of microsmissile. Able to freefall. |
||
|
Special Shooting |
Mega Beam Cannon |
1 |
31 ~ 245 |
Decent muzzle correct |
|
Special Melee |
Explosive Cable |
2 |
40 ~ 72 |
Jump to any direction. Cancel to A to fire 1 shot of main. |
|
Folding Bazooka(Derivative) |
(10) |
76 |
BC~A: Shares Ammo with main. Fires a single bazooka. |
|
|
Burst Attack |
Point Blank Mega Beam Cannon |
– |
270(F)/264(E)/287(S) |
Dendrobium point-blank mega beam cannon. |
|
Melee |
Input |
DMG |
Notes |
|
5B |
5BBB |
182 |
Orchis Giant Beam Saber slash |
|
5BB~A |
177 |
Will reload main ammo back to 10 no matter how much ammo you have left and fires out two shots. |
|
|
8B |
8B |
86 |
Able to deal 203 damage with just 8B>8B>8B. Dust Down |
|
4B |
4BBB |
151 |
Spinning attack. |
|
2B |
2BB |
154 |
Bounces. |
|
CC8B |
CC8B |
150 |
X-Slash |
Cancel Routes:
A: *AB, BC
2CSA: AB, BC
AB: A, BC
AC: BC
*BC: All melees except CC8B, AC, BC
Last hit of any melee combo: BC
Overview
The GP03 Stamen is an all rounder unit which “summons” out weapons from the Dendrobium to fight.
This unit has more value to being a back role unit with many harassment weapons like the Mega Beam Cannon and Folding Bazooka to save your partner and can use its Explosive cable to jump out of danger if needed. Even when forced to be in a taiman situation, even without the range weapon this unit still have decent melee combo to get a chance to win the melee fight.
Ranged Weapons
Main: Folding Bazookas
Fires two bazooka shots per input and reloads only when ammo is at 0. Takes 6 seconds to reload.
Try not to fire 2 bazooka out in a row if you do not have the confidence to hit the opponent . Instead just fire one bazooka and boost dash cancel away before the 2nd one is out to conserve ammo, or practice Double Impact to fire one bazooka then release CSA immediately.
Charged Main: Beam Rifle (3 shot/ High Ouput)
There are two types of input for this weapon:
1) *CSA except 2CSA: Fires 3 Shot BR which has good tracking but decent muzzle correction without causing vernier. Recommended to use this input more if you are not confident of your landing punishment, or just for suppressing fire. Also able to use this CSA to do a freefall if you cancel from any melee.
As there are no other cancel routes after you use this CSA, it is best to avoid using this move in extreme close range fights.
2) 2CSA: Fires one big shot which causes an instant knockdown on the opponent upon hit. Able to cancel to AB and BC. The muzzle correction, speed, and tracking is similar to GP01. Recommend to use this as a follow up to the last hit of your melee combo for high damage.
From this CSA you are able to use AB~A to do a freefall but the landing will be quite slow and you are unable to input any sidestep (no cut tracking). In the event that the opponent is focusing on you, it would be safer to cancel to BC.
Sub: Large Missile Pod/Micro Missiles
Able to cancel from the 1st shot of your main or you can do AB~A for a freefall. As this input does not force GP03 to auto face the opponent, it is best to manually turn GP03 to face the opponent first before doing this to prevent any vernier.
As there is hp setting for the containers, it is possible to hit and destroy these containers. The containers are also treated as a landing ground so you could aim to step on the containers to regain boost although it might be near impossible to execute in actual battle.
Take note that this weapon does not refill upon burst activation and also you can only use one input per move (Able to use same input again after the 1st container disappears). You can consecutively release two different containers instead if you plan to use up the ammo in one go.
There are two types of input for this weapon:
1)5AB: Summons a large missile pod on the left which fires 2 waves of 3 large missiles which has high speed but weak tracking in a fan shape, each causing a small explosion radius.
Even if you use this weapon at green lock, the muzzle correction is applied again at the 2nd shot. There is no effective range limit and as it has a wide range attack, it is quite easy to hit the opponent if he/she is not looking.
It is difficult to aim and hit but if you were to hit the opponent with 3 shots of this weapon after injection it will cause up to 225 worth of damage.
2)*AB: Summons a micro missile pod on the right which fires 12 small missiles with slow speed but decent tracking. The direction of diffusion is four shots left, diagonally right up, and diagonally right down. If you deploy the container directly above ground, it will disappear after hitting 1 to 2 shots.
Due to its spreading property, it does not hit the enemy in front of you, and unlike the 5AB , the projectiles will disappear before flying to its max red lock distance. It tracks well before the projectiles start spreading so you can aim for a landing punishment with this if you are close by.
Depending on how the opponent moves, the projectiles might deal a large amount of damage if they were to hit the opponent at the same time.
Special Shooting: Mega Beam Cannon
Fires a gerobi with great muzzle correction but with a bit of startup time. After inputting, the muzzle correction will be slowly applied at first and a strong muzzle correction will be applied again immediately before firing. However, the cannon will not hit if the opponent boost dashes away after the shot. Another good point about this weapon is that there is no PoV change and the muzzle is on the right which makes it easy to check the situation.
Take note that the ammo is only consumed when you fire the beam. If you boost dash out before the firing, you will not consume ammo. If you fire this weapon at a low angle, it won’t be as wide as firing above (similar to the AC of Xi Gundam).
A notable weakness is that there is no hitbox on the barrel so take note to not use it at a very close distance as the opponent might be behind your cannon’s muzzle which will cause it to miss completely. However, it is okay to be close enough to incorporate it into a melee combo. It also has no inertia, which makes it difficult to shoot when you are looking at mid distance.
Since the overall performance is very high, you can try to snipe with this weapon even when you are in green lock. Good to use as a follow up after the opponent is caught by your main or sub explosion, even if it is from a far distance.
Special Melee: Explosive Cable
An escape move where GP03 jumps according to your direction input and detonates an explosive cable along his tracks after jumping the full distance. This weapon does not cut any tracking, and you are unable to rainbow step out. You can do BC~A or cancel from any melee (except CC8B) or AC. Take note that damage correction is applied when you use AC~BC cancel route (Damage per hit from 31 to 26, total of 206 damage). A different voice line can be heard from your usual AC.
You can move at a considerable speed If you can master the timing of using this weapon to cancel from *CSA. The special feature of this weapon is that it has the property of turning to the enemy in any direction so it is unlikely to turn around and shoot with *CSA immediately.
As there is a landing property, the boost recovery timing is around the same timing as if you recover when you land with boost gauge at green. You can use this when you are overheated.
You will land normally if you perform this move from a higher altitude.
You can’t use it for an okizeme and as you can’t rainbow step out of it. The movement itself is slightly lighter without any big movement and the movement speed will increase while you are in Burst.
Because the weapon can be detonated even when you are hit, it is quite effective to jump to the back while intercepting an incoming melee. However, since the hold time itself is not very long, try not to be overconfident about this move. Basically, it is the key to self-defense when approached by strong opponents.
The detonation cable will not disappear even when you are shielding. There are reports saying that this cable causes multiple hits and causes 120 damage instantly. And not only can this weapon can be used to escape but it can only be used to chase the opponent and perform as part of a melee combo, example like: cable explosion hit~A > Cable explosion~A.
BC~A: Folding Bazookas (Single Shot)
A special motion whereby you fire one BZ shot after using BC. Due to the command, you may screw up your CSA charge so do take note. The damage from the BZ shot is the same as your Main and take note that there will not be no cancel routes to use after you use this.
Unable to use this cancel route if you do 7,8, or 9BC.
Melee Set
5BBB: Beam Saber Slash> Giant Beam Saber Slash
2 standard beam saber slashes, and summons out the Giant Beam Saber from Orchis for a final slash. Note that you can only down the opponent normally and it is easy to miss the 3rd hit when you are near the wall (It will get under the opponent at the 3rd hit and be treated as green lock)
Despite the concerns above, this combo still has high firepower. Recommend to step cancel forward before the 3rd hit and follow up with a Main shot for more stability.
5BB~A: Point Blank Folding Bazooka
Summons out the weapon container, reloads Main to 10 ammo and fires 2 bazooka shots. Take note that there will be a change of view when you do this. The containers shoots alternately instead of simultaneously, and you cannot sidestep cancel this as it’s considered a ranged attack.
You can boost dash out of the combo just as the reloads happens, so you get a full 10 ammo, and continue with another melee combo.
8B: Stab
Good damage and good proration, and also causes Dust Down. Good for a melee combo finisher.
Recommended to do 8B>8B>2CSA for a high damage.
4/6BBB: Horizontal Slash>Whirlwind
Initial hit has fast start up, making it a good melee when in a rainbow step war. However GP03 stands completely still while spinning. The spin itself has 4 hits, of which the first 3 hits are Stagger and the 4th hit is Down. Cancel out on the 3rd hit to combo into more damage as hitting a Downed target gives u a -25% proration.
2BB: Uppercut> Giant Beam Saber Slam
Last hit bounces, so feel free to combo into anything else.
Recommended to do a step cancel to the front after the 2nd hit and follow up with 2CSA.
CC8BB: X-slash
The first hit launches the target upwards slightly, while the second hit slams the target into the ground. Choose which hit to cancel out from for the best damage or utility.
Burst Attack
Point Blank Mega Beam Cannon
Hits the opponent up in the air and rides the Dendrobium to fire a point-blank mega beam cannon shot. The entire animation finishes quickly, and the Dendrobium flying upwards before firing makes it more difficult for your opponent to interrupt you.
The 1st hit will cause the opponent to enter a special down state but from GP03’s perspective it will be treated as a grab movement. Therefore, if the opponent is defeated by slashing or used Burst to escape, the whole Burst Attack will be interrupted and GP03 will freefall. Also if you happen to do this move on your partner, it will finish the whole burst attack animation.
There is no hurtbox in the Orchis part, so any projectile shot at it will pass through. But it seems to be treated as an object in the game so if the opponent came in to melee the Orchis will be in the way of the opponent making him/her unable to step on it and meleeing against an empty space.
The zero-range shooting is a gerobi that force downs the opponent. If the combo damage correction is not accumulated, it will still cause damage to opponent with shooting barriers. Example like Crossbone X1, the ABC cloth will be destroyed and still be able to inflict damage. (Conversely, if the damage of the last hit is lower than the durability of the cloth due to combo damage correction, the cloth may not be destroyed or at most destroyed but causing no damage to the unit)
There is no damage to the stabbing motion and most of the damage comes from the beam cannon. The damage will be heavily reduced if there is any interruption in between. The opponent can easily interrupt the Burst Attack as the Dendrobium stays on point until the beam cannon is fired.
Although there is not much use for this info, you could cancel the Burst Attack using *AB before the zero range firing and continue your melee attack.
You don’t usually have to worry about the down value as the last hit will be forced down.
Be careful when using this against MS bosses.
Strategies
- It would be wise for you to not spam the bazooka Main as it takes quite a while to reload and relying on your charged main isn’t the best option when someone is chasing you. Instead you can save your shots by firing the bazooka one by one (by BDC before the 2nd shot is fired) and could fire both when its a guaranteed hit.
- The sub hit rate in this game is quite bad so don’t count on it hitting the opponent too much. Use this most of the time for the freefall (AB~A) to land early & regain your boost faster.
- The AC has good muzzle correction. If the opponent is in mid red-lock range and he/she is not noticing you, there is a high chance that you will hit this move. But take note to not use it at a very close range as the mega beam cannon is so long that the opponent might be in between you and the muzzle of the cannon when you use it.(Sometimes it’s not a good thing to have long stuff)
- Lay down covering fire with BC~CSA. Release the CSA at the peak of your jump so you get more momentum carried over.
- As this unit does not excel in chasing the opponent, it is important to gain control the momentum of the game as it will be a disadvantage when it becomes a slugfest.
- All 3 Bursts are good on GP03. F Burst powers up your melee, although there’s no real need for GP03 to get aggressive. E Burst is probably going to be your default choice when teaming with a 3000 cost partner. S gives you great firepower and allows you to fire your amazing gerobi more often.
- GP03 wants to take the back role, supporting a 3000 cost suit. It can also do well in a double 2500 cost team, but does not enjoy teaming with 2000 or 1500 cost partners.